Pride an Prejudice Uniform Trim Project Tutorial
The production was Pride and Prejudice and the Costume Designer was Susan Mickey from the University of Texas at Austin. The Draper for this show was Kathy Brookfield, and the Tailor for the menswear was Sheila Morris. Kathy was in charge of draping the women's costumes, which where absolutely stunning. And Sheila was in charge of the menswear, including the absolutely swoon worthy tailcoat and overcoat for Mr. Darcy.
The principle actor's costumes were built in house by the APT costume shop. A portion of the costumes were "pulled" from the exquisitely archived costume stock at APT. The military uniforms were manufactured by a custom uniform shop according to the actor's measurements. They were then shipped to the costume shop in Spring Green Wisconsin where they were fit on the actors by tailor Sheila Morris. Each of the coats was then altered according to the standards used by the shop to assure that they will be able to be used by many other actors for years to come.
 |
| This uniform was being altered at the center back neckline for a custom fit specifically for this actor in this production. The coat will be able to be re-altered in the future. |
Then Susan and her assistant Kelsey Vidic set up and designed trim for each tailcoat individually using gold braid and shoulder boards that they purchased or pulled for the show. They set up all the trim by pinning each section of braid on the uniforms while on dress forms and took photos of them. I was then able to reference the photos when pinning and sewing the trim. Kelsey bagged each of the trim "kits" separately. These bags of trim were carefully marked with the actor's name and stored with the photo in the boxes used to organize all the little pieces and parts assigned to each character.
I found the placement for the trim by basting in some guide lines so the finished points would all line up when the coat was closed. Note that the center of the body is not the same line as the edge of the coat front. So I had to mark the center of the body and measure the distance of all the trim pieces from that line, not the coat front line.
I placed the top and bottom pieces individually based on the distance from the bottom of the coat and the shoulder line. I then counted the remaining pieces that needed to fit in between the top and bottom and used one of my favorite tools to find those evenly spaced marks
After all the placement was marked I made the individual trim units by cutting the braid and using Fraycheck on the ends to assure that they didn't unravel, as they proved to be considerably unravely.
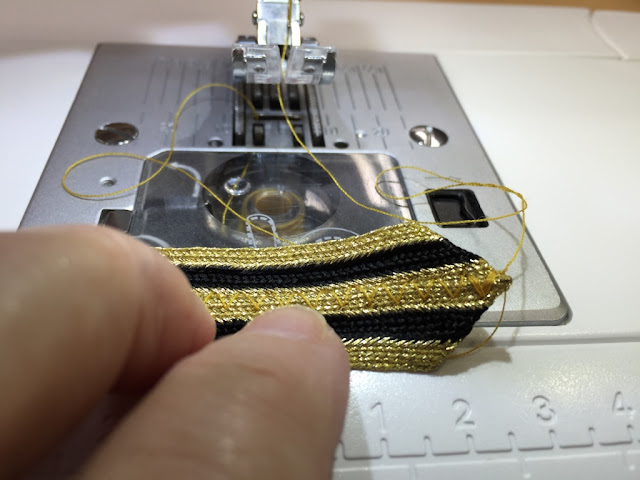
After the trim was dry I could zig zag the pieces together by starting at the ends and zigging across the ditch. The walking foot on my machine came in very handy to keep everything going smoothly and accurately.
I then pinned the little trim units onto the coat front and again used my walking foot or IDT for Pfaff users to keep the work very precise.
And then the other side:
All pinned and ready to sew.
The finished coat front.
They each got sleeve and collar trim and big whopper popper closures as well.
I thought you might enjoy the process of how these things come together.
The trim only portion of all these uniforms (I believe there were a total of 6) took me the better part of a 40 hour work week to complete.
In sharing this I hope you are able to see how much thought and care go into a production.
If you have any questions or comments please share in the comments section below. How have you handled tricky multiples projects? I love to hear what you like to see more of so let me know. I take pictures of all my projects as I go now so I have a lot more in the vault to share.


Comments
men s suits